A Fish Mold by Graham Baker
In this example Graham Baker creates a mold from plaster of a fish made in clay. As I get the photos of the finished project I will add them here for you to see. You can click the images for a larger version of the picture.
Step 1
 Here are the two halves of the fish. They have been built from clay, starting with two cardboard cut outs.
Step 2
 A clay dam has been made with clay and lino around one half. You do not need to use a release agent when you are pouring plaster against clay.
Step 3
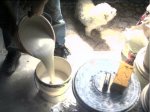
 Mixing the plaster in two buckets for the large mould. Always add the plaster to the water, otherwise the plaster will seem to explode and could get into your eyes. Let the plaster soak for about 10 minutes before mixing, this is called soaking and will get rid of the air in the plaster. A good mixing ratio is 1 liter H2O to 1.4 Kg plaster.
Step 4
 Mixing the buckets of plaster after they have been mixed up separately. The plaster should have been starting to thicken up and then the two buckets of plaster mixed together so that they will be of the same consistency. If the two buckets are poured into a mold separately they will go off at a different time and then one mix will try to draw the water out of the other mix, this will end up with a mold that has hard and soft places with in the plaster, this will cause the plaster to crack and fall apart. It will also make any clay formed against the mold to dry out at different rates, causing the clay to shrink at different rates and cracking.
Step 5
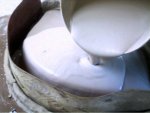
 Starting to pour the first bucket of plaster. The plaster is like cream in consistency, and poured all over the model so that any air bubbles that you see can be got rid of. The rest of the plaster is left to go of a bit more and then you use your hand to remove it from the bucket.
Step 6
 Build up a layer of 50mm (2") all over the model.
Step 7
 Using a rubber, metal kidney, smooth out the surface of the mold to take away the sharp edges that could cause you to scratch yourself.
Step 8

