Boating - Amphora
Amphora - Painting the Bottom
Mike has turned this project into something I thinks he plans to give his child or something. I am starting to think that he will be done with this thing by the time his first born has arrived. (Just kidding ... Well, sort of.)


 Mike has decided to paint his boat a nice dark blue with white trim. So here you see he has everything taped out to start with the blue on the bottom. We are using an oil based exterior trim paint here. Now, I know this is not boat paint but there are a couple of things to consider here. First, this little boat will not be living in the water and second, I just can't see spending enormous amounts of money on a little project like this. Hey, I am thrifty, or cheap. Just depends on how you like to look at it!

 Now that the taping is done, Mike starts painting the bottom and keel. He is not happy about how the paint covers, but I reminded him that it is better to have several light coats than a couple of heavy ones. I told him he would need a minimum of three coats anyway. The paint can reads that you have to wait 12 hours between coats. That didn't really make him happy either!
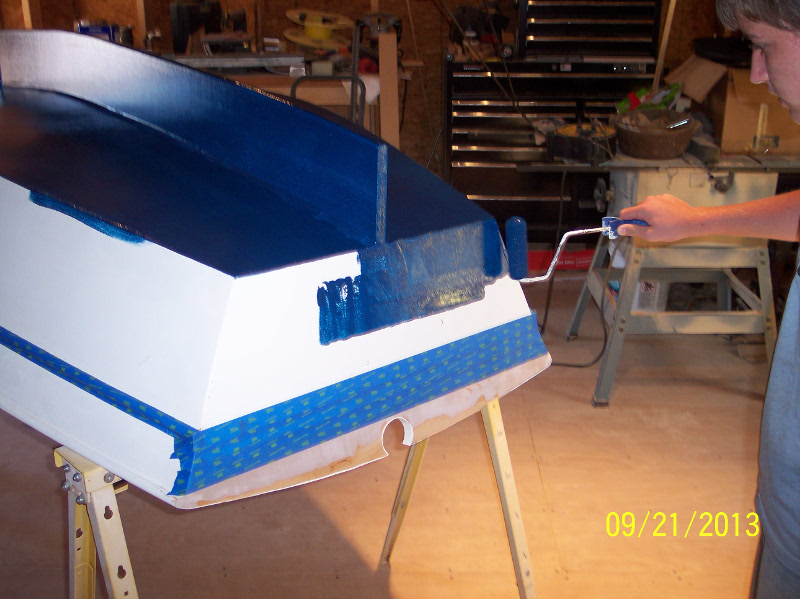
 With the bottom done, Mike starts on the transom and lower half of the sides.

 Mike has finished the first coat of the bottom, sides and transom. Now he will have to wait until tomorrow for the second coat.

 Mike has just finished the second coat and is proud of his work. He even asked Mom to give her opinion. She told him it was Looookin' Nice!
Amphora - Priming The Top Deck and Inside
 Here you see Mike priming in the forepeak.· This is the third coat on the inside of the boat.
 More painting in the forepeak.
 Painting the cockpit sole.· This is the third and final primer coat for the inside of the boat.
 Here Mike is painting the hole for a sculling oar on the taft rail.
 Mike is painting the side deck.· This is the second coat of primer for the topsides.
 Mike is painting the forward deck.
 You know, I never could really get Michael to smile for a camera. Here he is with the second coat of primer finished on the topsides. All the priming left is one last coat of primer on the topsides, then comes the color. He still has not decided what color he plans to paint it.
Amphora - Priming the bottom and sides
 With the fairing finished on the bottom and sides, Mike is ready to primer them up before flipping the boat over. The plan is for three coats of primer making sure we have a good sandable base in which to lay the top paint. Mike finished with the first coat of primer. I see he was artistic with his tipping brush. What he didn't think of at the time was that he would have to sand them out because they would show through. Oh well, live and learn.
 Mike is rolling the primer on the sides.
 Mike is finishing up the third coat. I think he is looking forward to flipping it over and starting the other side. Well this was the end of a long hot day. I am proud of what Mike was able to finish today. It seems like he is motivated to get it finished and to get it in the water.
Amphora - Working on the topsides
 Mike cleans the inside of his boat out to get ready for the next days work. Next we will need to fair the screw holes in the top deck and other goodies.
 Mike is at it again. Here he is sanding more body filler fairing it all in. I got to give him credit. He just keeps going and going despite the high mid 90's temperatures we are having.
 With all the screw holes filled and the delaminated veneer sanded out and faired back in with bondo, we went ahead and covered all the below water seams with 3M 5200. The 5200 was not called for in the plans, but the Stevenson's do recommend it in their weekender video. So I figured it could not hurt anything and would definitely make the boat water tight.
 Here is another shot of the seams. Getting all the way in the fore peek area was tough. Just a word of caution, 5200 is messy! Now for those wondering, I bought two 10 oz tubes from Jamestown Distributors. I used all of one and a little of the second. Truthfully, if you are neat with the stuff, you probably could get by with just one tube. Once opend, it has a short life (12-24 hours) before it needs to be used. It is kind of expensive so decide for yourself. 1 lump or 2!
I mentioned some veneer delamination in the section above. This boat is made from luan plywood. I know that it is not the best thing to make a boat from, but the price is right and you can only get a kid to work so much for a project. To make matter worse, Mike left the project for a long time and the boat set on the back deck for a long time before it was moved to my out building. So, we had these few places that the veneer was coming loose. The veneer seems just paper thin to me. But the wood underneath was sound. We just sanded the loose veneer off and skimmed it with body filler. If you look at this picture you can see the spots on the fore peek. BTW, that was the only place other than on one of the side skins inside the boat that it happened.I would still be willing to build with it. :-)
 With the under water seams covered with the 5200, we started on the inner rub rails next. These bend on and glue quite easily. Now they are supposed to be screwed on, but we attached them with small brads. I am sure the glue will hold them just fine.
 Here is another view of the inner rub rails. I think it really does a lot to give the boat a finished look.
 Lastly, the top of the transom has been attached. I keep calling it a taft rail but perhaps I am wrong. Now a couple of things to point out. In the plans the sides were supposed to come up above the deck further than what Mike's did. We struggled with the sides for whatever reason. Our solution was to get the outer top rub rail in position trying to give a fair sheer line, then cut the remaining bit to the top of the rail. As a result, the top of the transom had to be adjusted accordingly. We reduced the height so it would not look so odd sitting there.
Next, some more fairing and doing some cosmetics here and there. After that, I think Mike can have a great time priming inside the fore peek and the rest of the boat. Now if he would just decide on a color scheme. We are getting closer and he is itching to take it out. I just hope his enthusiasm holds out till it is finished. :-)
Amphora - Finishing the bottom and sides
 I had to give Mike an ultimatum, either finish his boat or it was going to the dump. Seems that he would rather finish it than see it go to an earthly grave. Most of the boat is together and all that needs to happen now is lots of screw hole filling and sanding. We decided to start with the bottom and work down the sides. Here Mike is making quick progress with the sander. He seems to be excited about working on the boat again.
 With the bottom section done we move to the sides. Again, here is mike sanding away at the body filler.
 Mike tells me that hand sanding Bondo is no fun. The section between the rub rails is too small for the power sander to fit in comfortably so there had to be a certain amount of hand sanding.
 Poor Mike, he is still at it. I have to give him credit, he has been a trooper. The temps have been in the mid 90's and he just keeps going.
 Here is Mike knocking down the high spots before the bondo sets up too hard. Mike has learned to appreciate this tool. The more he can shape now means less that has to be sanded later.